Coronet Minor Ten in One Universal Woodworker SOLD March 7th 2013
Please note that I supply an A4 size copy of the Minor/Minorette manual which can prove easier to read if your eyesight is a bit wonky like mine. Please use this link to the Minor Manual page. coronet-machine-instruction-manual.php
About my old Ten in One (wipes tear away and starts humming Auld Shep))
This machine came from a garage in Seaton, Devon where it had been stored for three years. It was originally purchased by a Mr Arber from Upper Faringdon near Alton, Hants in 1973. The bill of sale gives the suppliers name as Parry & Son (Tools) Ltd of Old Street, London EC1. At some point the owner must have relocated to Devon as it ended up in the hands of a man who dealt in house clearances who subsequently left in his fathers garage in Seaton. His father duly wanted the space back and sold it once to a man who was duly informed by his wife that it was too big for his shed and so never collected it. Then it was sold to me who did collect it, in fact I nearly bit his arm off. Although all the parts were there, every inch of bare metal was covered in surface rust and deeply pitted in places. The sale also included the original bill of sale, consignment and delivery note and some original Coronet literature. See Coronet Minor Paperwork
Although I have started the restoration and am using the Minor on a regular basis there is still a lot of work to be done. The cabinet needs to be respayed, the morticing attachment needs cleaning and maintenance and the thicknessing attachment needs the same although the planer is up and running. There is the moulding block, the speed reduction wheel, the grinding wheel, I could go on. As it is finished it will be added to the page below.
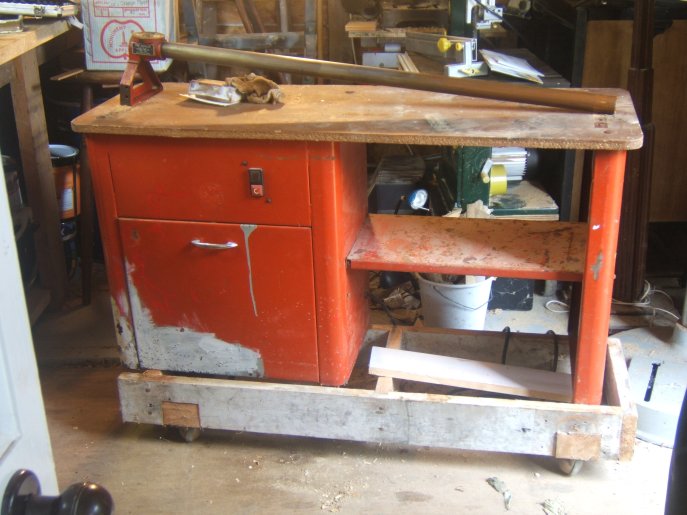
Above you can see the stand and cabinet with all the hardware removed for inspection. All is left is the long bar bed with the headstock base above the left hand bracket. The cabinet is resting on a home made dolly with castor wheels that have seen better days. There is some serious decay going on at the bottom left of the cabinet, it reminds me of the door sills from an Austin Maxi I once owned.
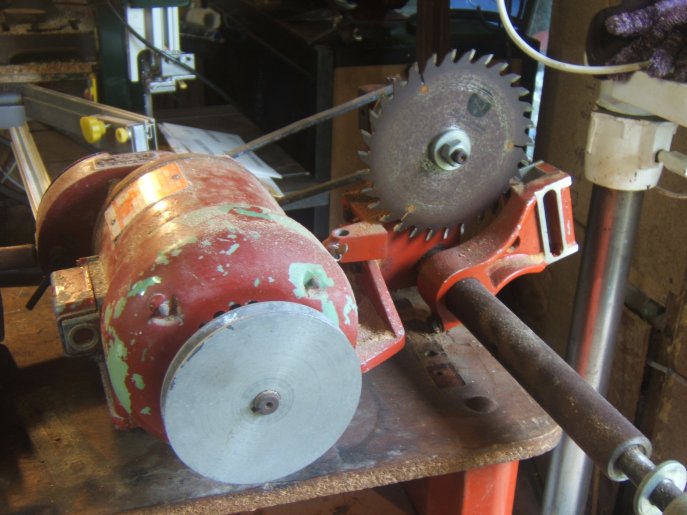
Here you can see the factory fitted 0.5hp Gryphon motor that powers the whole unit. On the other end of the motor is the speed reduction unit. Behind the saw blade is the spindle pulley and below that, the short arm bed to which the planer/thicknesser is attached. The saw table leg slides into the open square bracket to the right of the saw blade.
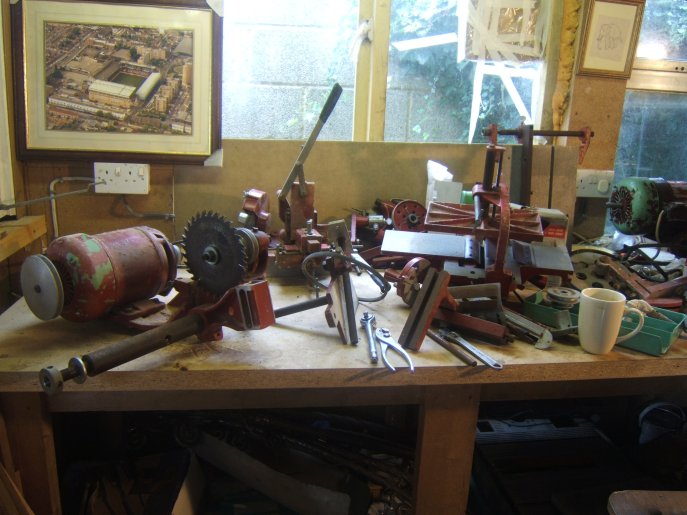
These are all the attachments and bits unloaded onto my workbench. After a brief inspection it became clear that every single piece was going to need a thorough clean before reassembly and use. I decided to do a back to metal job on every last bolt and washer as this was clearly a unique collection. And although it would be time consuming the finished job would certainly be worth it. This time I would remember to record every process by writing down and photographing the procedures having spent many hours before staring at heaps of bits that made no sense whatsoever. This is particularly true when you are just doing the odd hour here and there and sometimes going a week or two without spending time in the workshop.
The restoration.
I removed the table saw from the saw arm holder clamp and and then lifted the headstock off the bed by undoing the nut underneath. By removing the right hand foot bracket I was able to slide off the saddles and tailstock off after some preliminary oiling and rubbing down with some fine sandpaper. After removing the left hand foot bracket and the bed bar the worktop was made clear for cleaning and sanding. There was hardened paint splatters and other stains that came off easily with a sharp blade and some medium sandpaper. The side of the worktop also got a light sanding as I did not want to split the chipboard, it is surprising that these boards did not have an edging strip on them for protection. The cabinet itself was not in too bad a condition but was suffering from some serious rust and corrosion on the bottom left hand side, presumably where it had been up against a damp surface for a considerable length of time. I stabilised it with some WD40 and a wire brush off as it was not a priority. I have got the spray paint to repaint the cabinet and that will be a job for the summer. The paint colour according to Derek Pyatt (coronetwoodworking.co.uk) is Post Office red and I easily bought some off an internet car supplies site. (Though some of the attachments are of a colour that is more like the maroon of the Major) Last thing to do before tackling the headstock was to remove the saw blade from the spindle with a spanner and a tommy bar through the hole in the spindle.
Removing the threaded spindle from the headstock
I felt that after about forty years since the machine was put together it was probably time to check the spindle bearing for wear and tear assuming of course that it had not been done before. The official Coronet Minor handbook has detailed instructions on Headstock Spindle removal and Main Bearing Adjustment. I have published this on my site here Coronet Minor Instruction manual you need page 16.
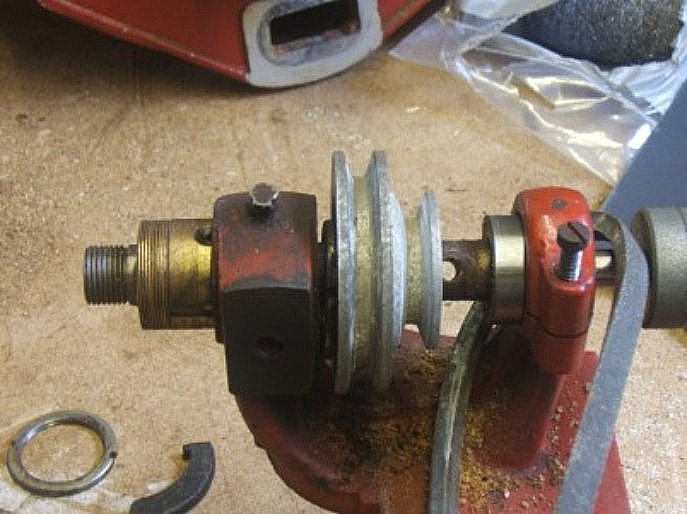
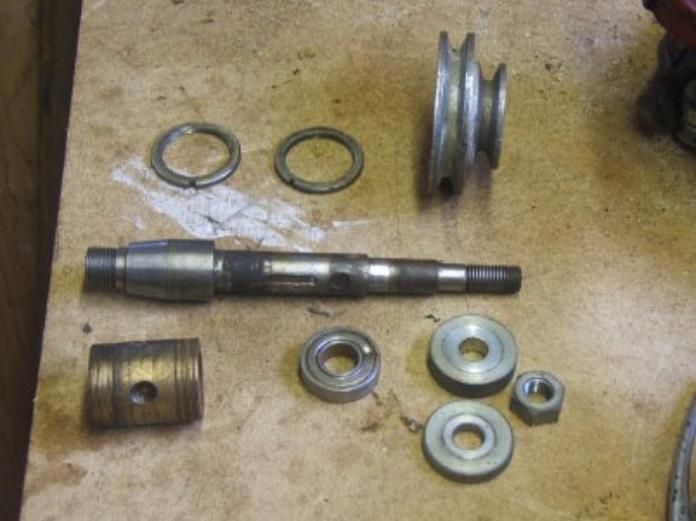
Below is the spindle and bearing assembly dissassembled. You have to admire the engineering on the spindle. In fact you have to love it.
My next step was to strip down and rebuild the speed reduction gearbox. I felt this was necessary as it had not been used for some time and the clutch plate was clearly rusted up. I did not know what else if anything had seized up inside so was reluctant to even start it up. Besides that I was very interested in seeing how this was put together. I followed the step by step instructions in the Coronet Minor Instruction manual which proved to be precise and easy to follow. Before I started to strip it down though first of all I inspected the outside:
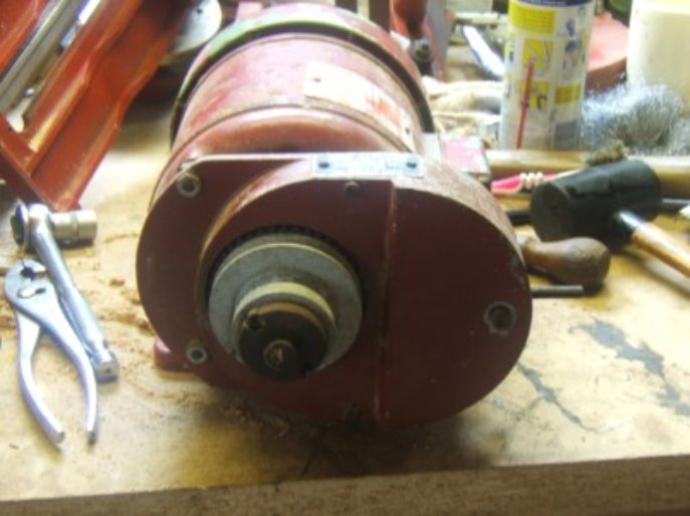
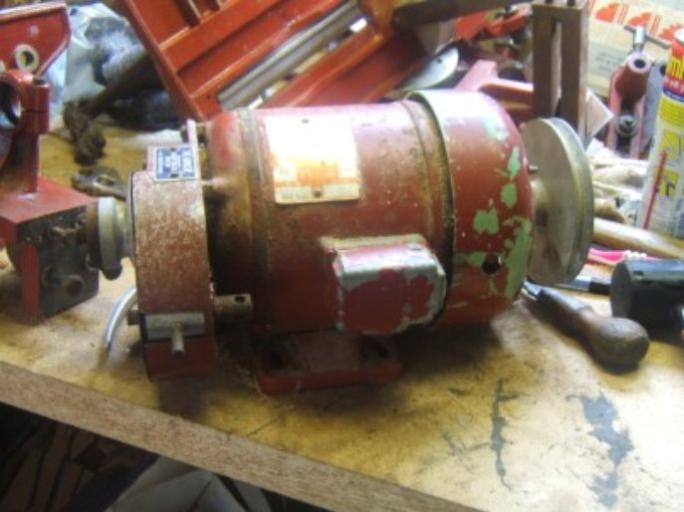
Mostly surface rust to be brushed off. The metal parts will all clean up nice either on the wire brush wheel on the bench grinder or by hand for the softer metal of the pulley wheel. Shame about the areas of flaked paint but this is purely cosmetic.
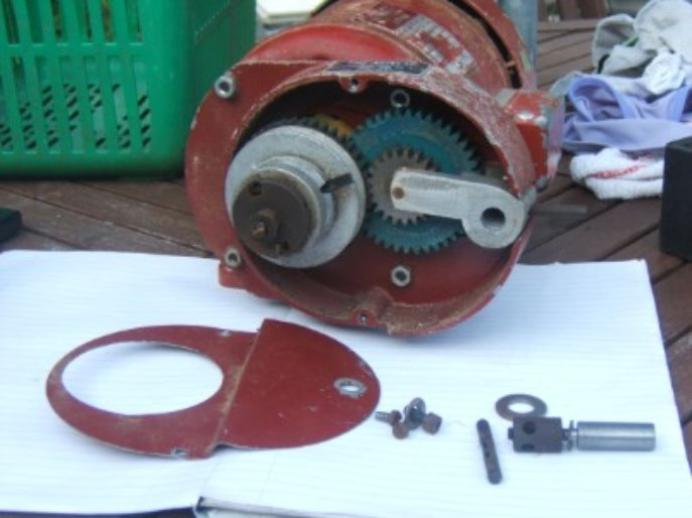
The first step is to remove the outer casing. And dissassemble the lever shown on the right. Note the motor is now on the garden table.
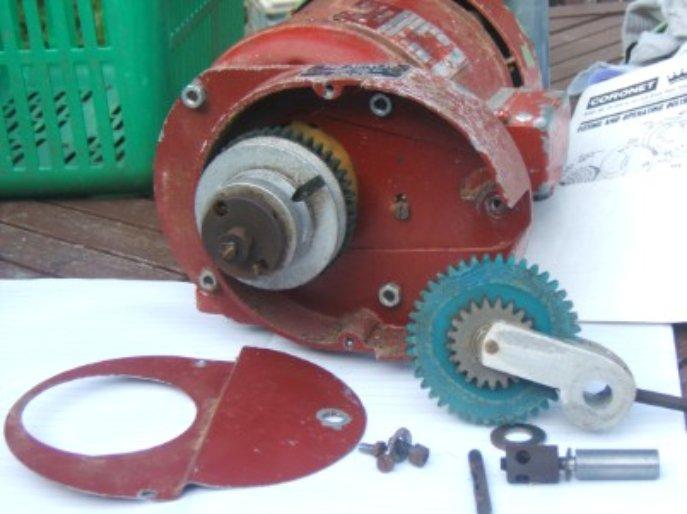
Remove the cog arm. This will all come out in one piece. Inspect the cog wheel for wear and tear. There is some wearing on the inside edge where it connects with the cog on the back of the pulley.
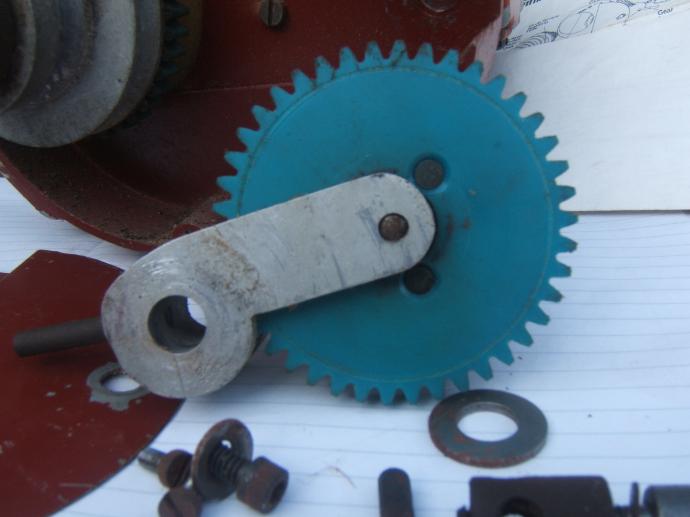
The other side is clean and has no wear.
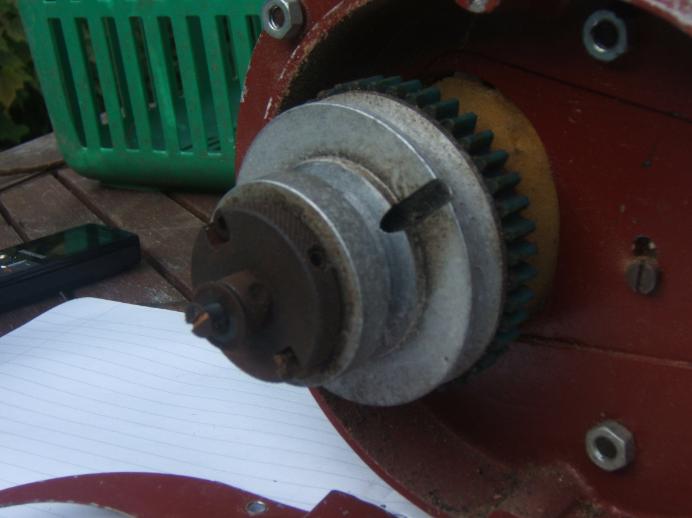
Next step to remove the clutch plate which is seized with rust. I freed it up with some WD40 and cleaned the spindle so it could be slid off when released.
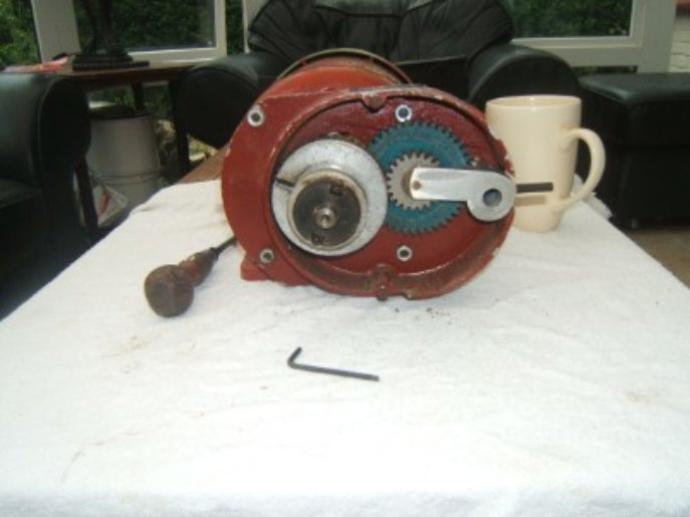
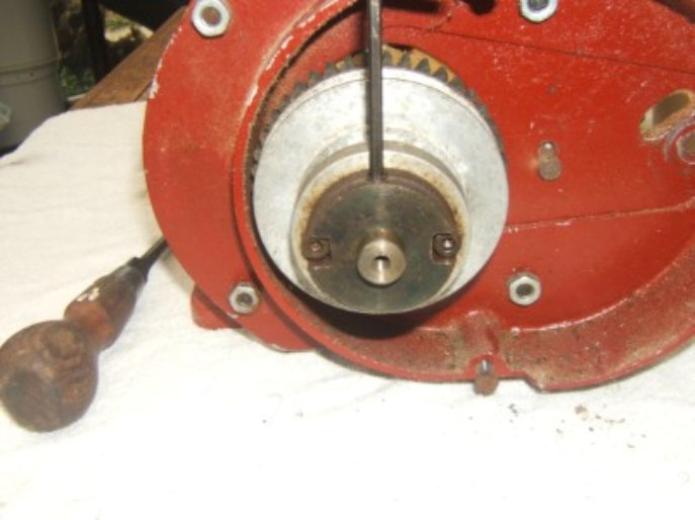
You need an allen key to undo the plate retaining bolt. Not that my machinery is banned from the house of course, but it's open to interpretation at my end.
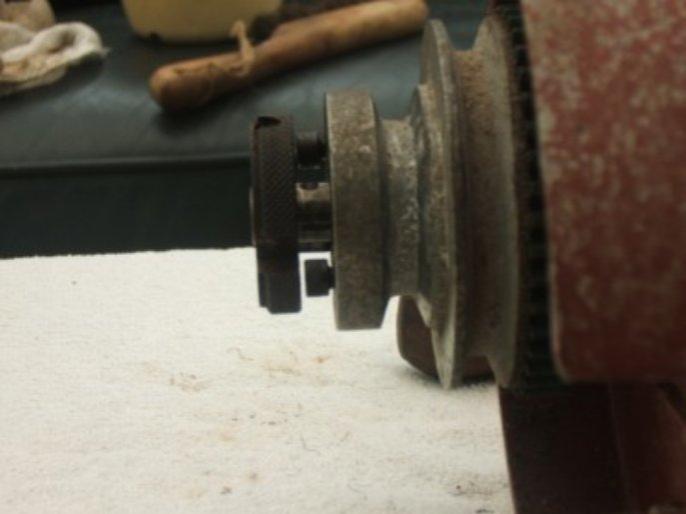
The plate is now half off over the Allen bolts and you can see the inner ball bearing indent. Watch out for the ball bearing falling out when you pull the plate all the way off.
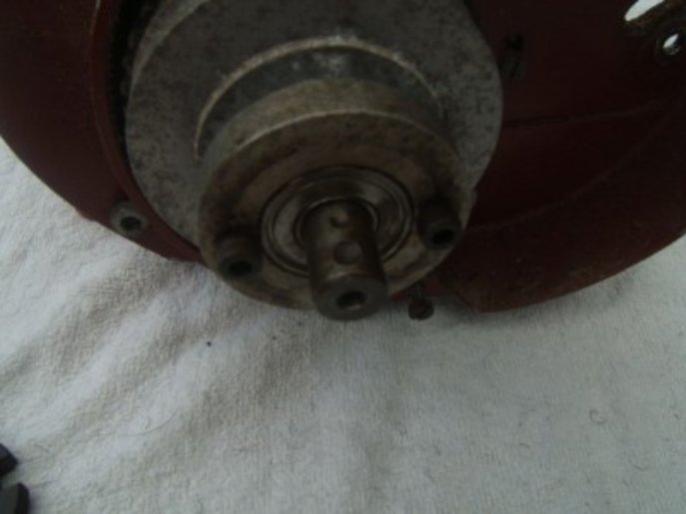
Now the spindle is clean you can see the indents on the top for the ball bearing to sit in when the clutch plate is in whichever position. The plate is now completely off allowing for the pulley wheel and attached cogs to be removed.
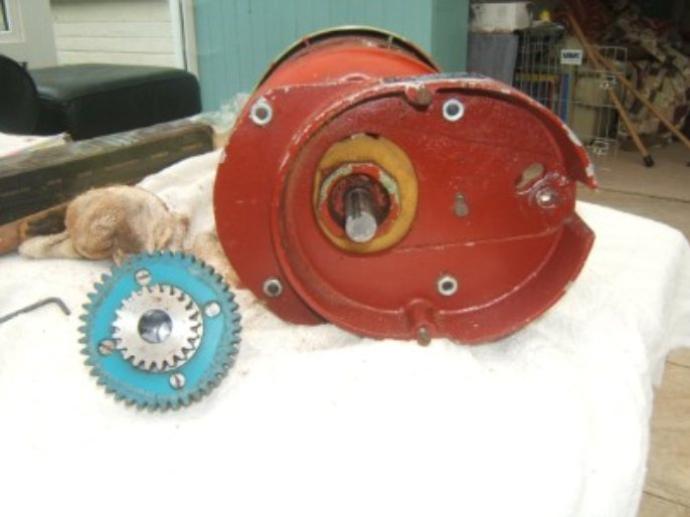
You can see the cogs on the back of the pulley. Note the matching wear on the blue cog wheel.
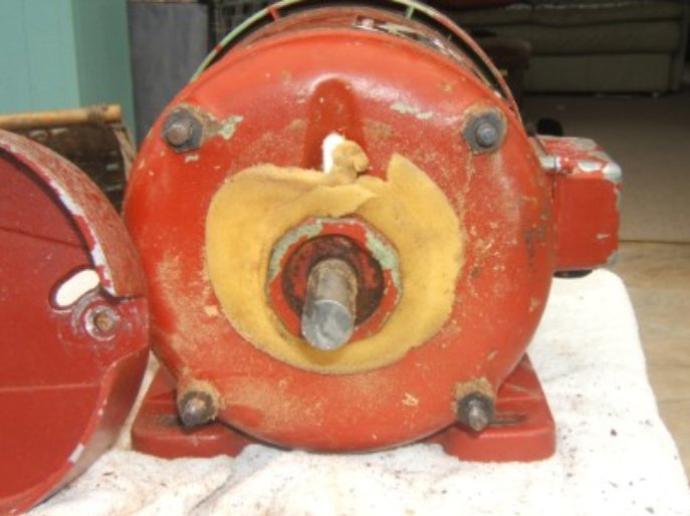
All there is to do now is remove the back plate and clean the foam wadding designed to stop sawdust getting into the gearbox. Note the white grease nipple cap.
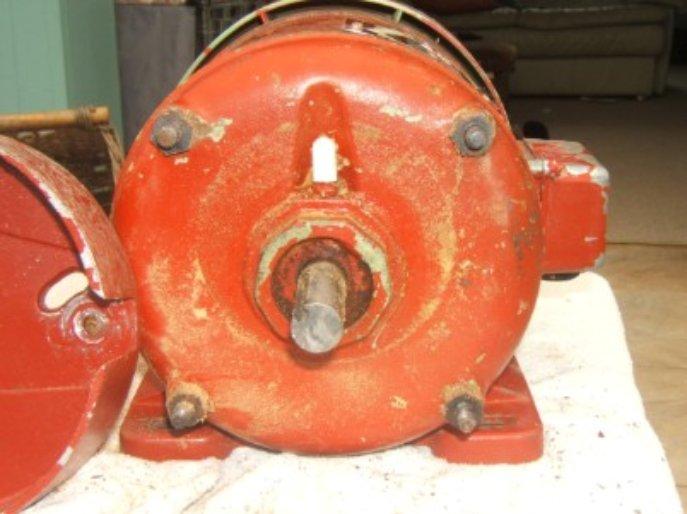
The foam is removed and I took the chance to apply some grease. To refit you just reverse the process. I found the instructions in the manual to be excellent. The only thing it doesn't mention is the ball bearing but perhaps if you were experienced with this type of gearbox then you might know it was there.
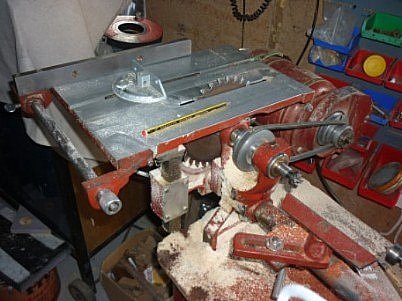
You little beauty!
Right, time to attack the bodywork of the cabinet. The worst section for rust is the lower left front corner of the cabinet and the cabinet door. There are various other gouges and scratches on which varying levels of repair have been attempted, all in all it just looks rough. Fortunately there are no perforations, just deeply pitted rust.
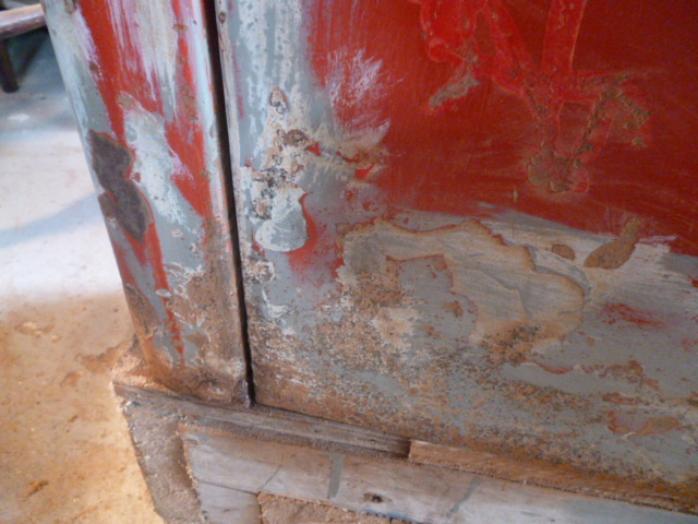
First job was to remove the cabinet door but the left hand side bolt was rusted solid so had to be cut through with a hacksaw.
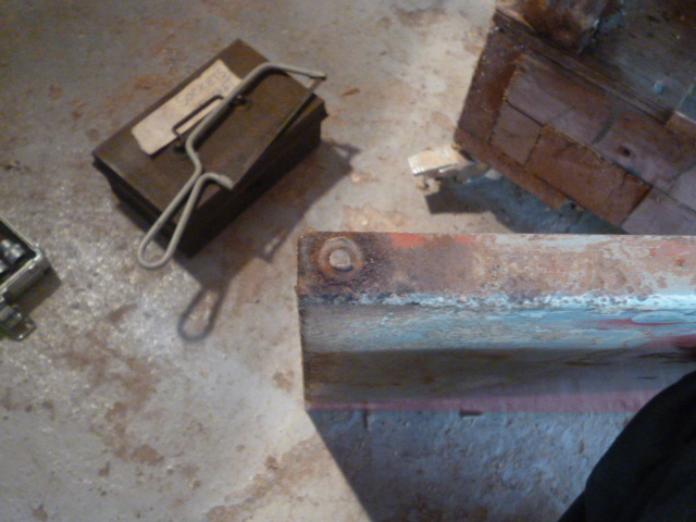
There it is removed and wire brushed to show the damage.
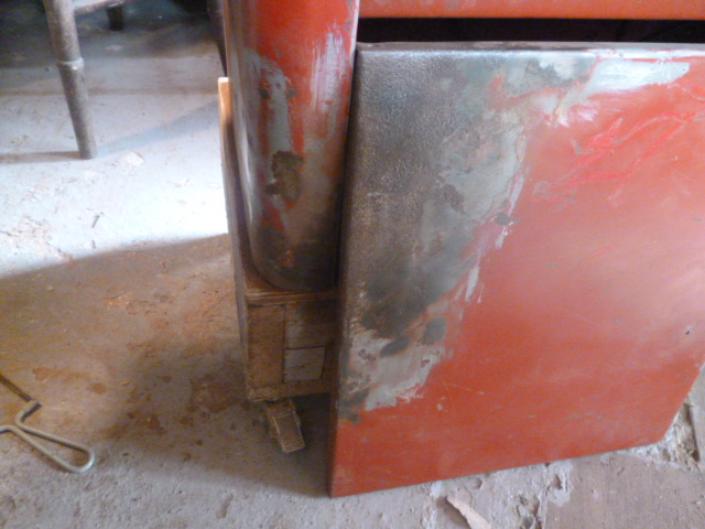
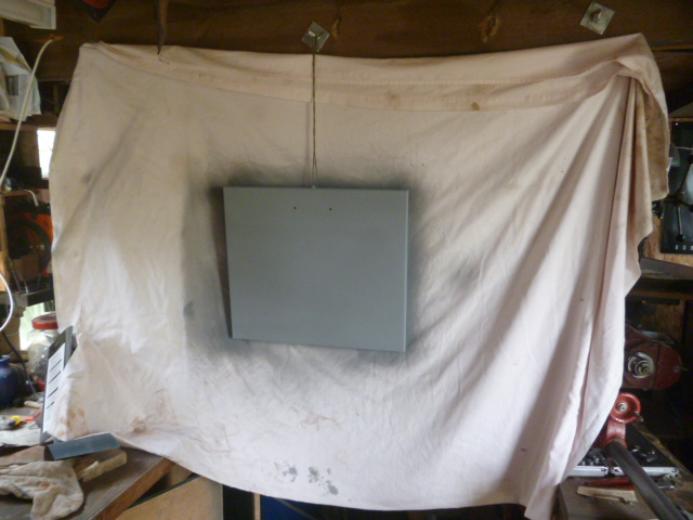
I took the door handle off so make the restoration easier. I used a cup brush on an arbor with an electric drill to remove all the rust and flaking paint on the door. Then I used a rust removal gel with wire wool to dissolve any remaining rust before rinsing it down with soapy water and drying it. Next I went over the worst pitted area with a two part metal filling compound and rubbed it down with two grades of ally oxide paper to prepare the surface for spraying. So the next step was to get it in to the (ahem) Boleyn spraybooth for priming and undercoating. (see below).
Next up for prep while the door is getting its coats, is the external shelf. Now that reminds me of a Morris Ital ex GPO van I once had. I am not kidding.
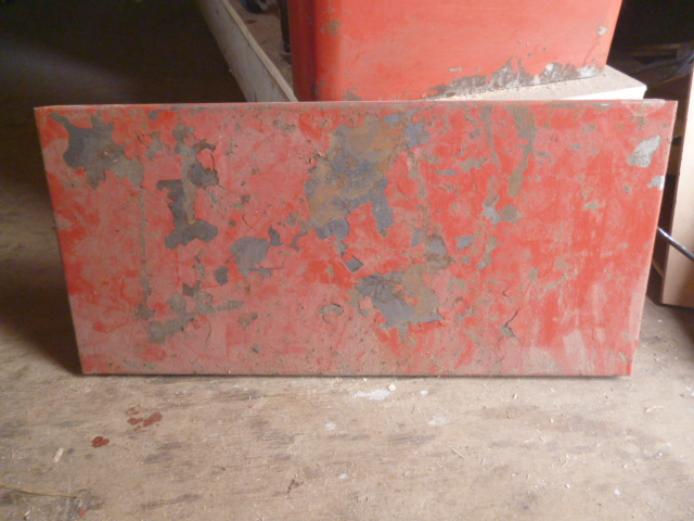
I have a photo to prove it.
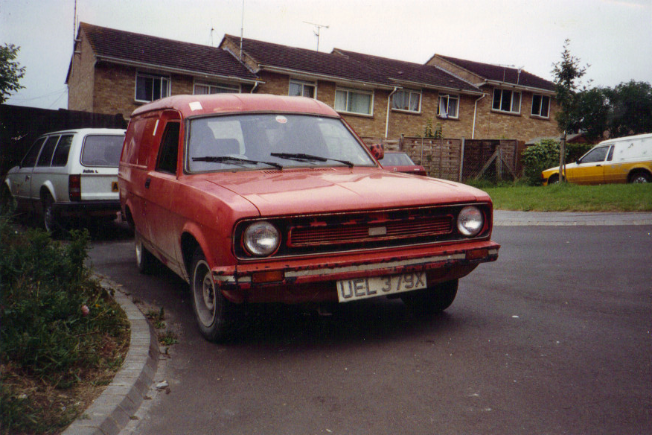
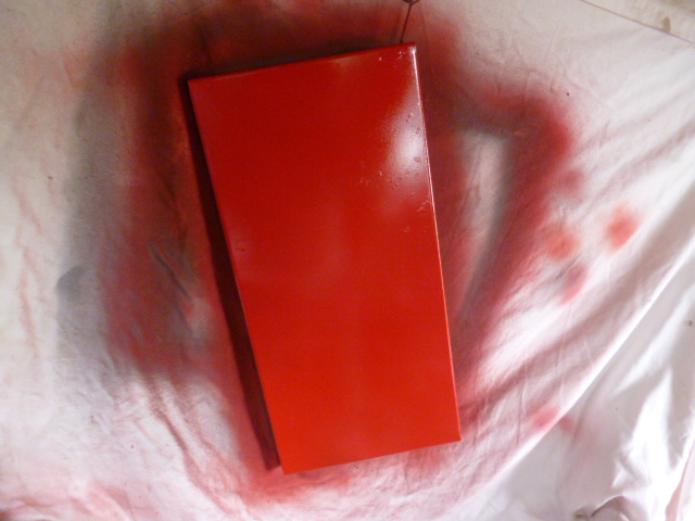
See what I mean? But in the meantime the shelf has been derusted, primed and sprayed Post Office Red.
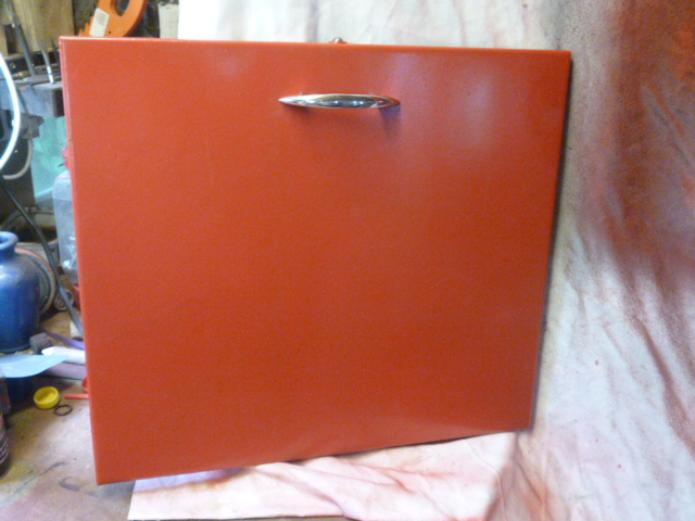
So has the door...and the handle refitted.
The cabinet got the same treatment as the door and shelf though a bit more bodywork was required for the dents and scratches particularly on the lower corner. This needed some filling and reshaping to the curve. Once it was all rubbed down it got it's first undercoat.
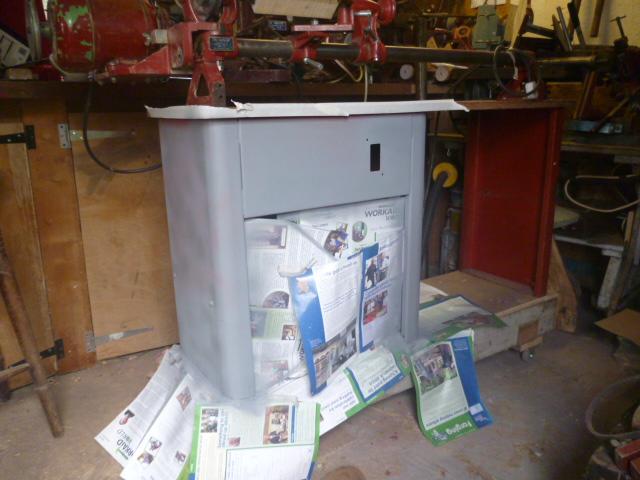
And one more before repainting in Post Office red.

And from the side. I am well pleased with that finish.
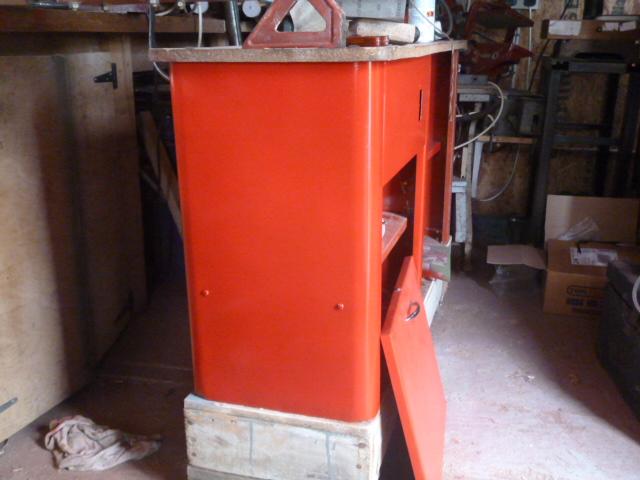
Now to refit the shelf and cabinet door. After that I will start prepping the back of the cabinet and the end piece which don't require half as much work.
There are a couple of attachments to be restored yet. For instance there's the mortising jig which is a larger and more fiddly job than this one, the pulley wheel of the speed reduction system. As you can see, two or three years in a Seaton garage have done nothing for the appearance of the wheel but it seems to be cosmetic only. This is going to be interesting stripping this as it looks like there is more to its construction that just a wheel on an extension bar.
I remember this attachment being on top of the heap of parts when I found it and this side got the worst of the damp.
This side not so bad.
A closeup of the wheel showing a nut in the end of the spindle, now what could that be for?
On the left is the side that attaches to the main bed bar and on the right is the arm that is made adjustable by the addition of a spring.
An exploded view of the components before cleaning.
The components refitted to the arm.
The spindle with the end nut partly unscrewed, note the hole half way down which is directly underneath where the pulley wheel sits.
With the end nut removed you can see the hollow spindle. This is for lubricating. When oil is put in the spindle and the nut replaced, it will flow through the hole which is situated directly under the pulley wheel.
The collar slides over the end of the spindle and is kept in place by a grub screw.
When all the components are reassembled they look great but make the paintwork on the bars look well scabby. They need painting, don't they...
I'm guessing that wingnut is a 3/8, what do you reckon?
Next up the slot mortising jig and here it is, parked in front of a No Parking sign. It's another item that I remember being on top of the heap in
that seaside garage but I'm confident of being able to bring back to an
at least respectable condition and make it a real pleasure to work with.
At least I think it was in a seaside garage. From this side it looks like this jig was left on the beach.
Not so bad from this angle.
The quality of the construction materials is reasssuring on a project like this. You just know it will be alright.
The picture below shows the jig removed from the saddle. You can see how securely it is attached.
These linkage joints are never going to fall apart during use.
Is that sand or sawdust?
The bed slides off the stand in construction similar to that of the table saw, it may well be the same stock.
The lower linkage arm showing how it is fixed to the jig.
The stand is going to be removed in order to clean the runners.
And there it is removed, with some serious cleaning needed. I'm sure it will be easier to use when it can move more freely which it has not been doing so far. This is a great little jig and a pleasure to use.
This machine was sold on March 7th 2013
A sad day for the Boleyn Workshop when this little beauty left for its new home near the Brecon Beacons. But it's gone to a good home and more importantly will be working. Best of all it's gone to another Pete.
I was contacted through the website by a dedicated shed man and beekeeper. I shall refer to him as Pete 2. He showed interest in both the Majorette and the Minor and drove all the way down from remote North Wales for a visual inspection with the intent of taking one of them home. Although the Majorette is a robust and compact machine with built in versatility it needs some refurbishing and the newly restored Minor proved the more attractive. Over a cup of tea we discussed the merits of both machines and the suitability of each for his workshop needs. Once a decision was made I then had the task of stripping the machine down for transport and collating all the attachments. Pete 2 invaluably carried all the parts to his vehicle while Pete 1 ransacked the Boleyn Workshop for all the parts. Once loaded it was time for another pot of tea and to pass on the paperwork which amounted to more than comes with the average second hand car. It all can be viewed on the Coronet Minor paperwork page. It was not easy to track down. Every desk and box file had to be searched and there was me believing it was all together. Pete 2 sat calmly supping his tea while Pete 1 ransacked the whole property for every last bit. A Morphine moment if there ever was one. All too soon the paperwork was handed over and it was time to say goodbye to the longest project that has ever tooken space in the Boleyn Workshop. I thought all the accessories had been packed but the next day Pete 2 contacted me to ask about two bits that were listed with the Minor. Oh no, I thought, where the **** are they? It was another Morphine moment. Fortunately I remembered that these attachment was actually attached to the Minorette that is out on loan to my good friend Derek. It was no bother to contact him and to arrange collection for forwarding on to Pete 2.
- FOR SALE
- About the Boleyn
- Home
- Zakwood Workshop Embu KENYA
- Julian Harrisons Workshop
- Inside the Boleyn (2005-2012)
- Inside the Boleyn 2013
- Inside the Boleyn 2014
- Inside the Boleyn 2015
- Inside the Boleyn 2016
- Inside the Boleyn 2017
- Inside the Boleyn 2018
- Inside the Boleyn 2019
- Inside the Boleyn 2020
- Inside the Boleyn 2021
- Inside the Boleyn 2022
- Inside the Boleyn 2023
- Inside the Boleyn 2024
- Inside the Boleyn 2025
- Technical Stuff
- Speed reduction gearbox fitting and operating instructions
- An Interview with Derek Pyatt
- Apollo no1 stove
- Coronet Imp bandsaw-blade-setting-advice
- Coronet Imp official hints on using
- Brook Gryphon 1hp motor connection diagram
- Charles Parker
- Coronet advertising etc
- Coronet Woodworking Machines catalogue
- Coronet Capitol planer
- Coronet Sovereign planer
- Coronet Classic 10 bandsaw
- Coronet Imp bandsaw
- Coronet Consort
- Coronet Elf
- Coronet Hobby lathe
- Coronet Home Cabinetmaker
- Coronet International Woodworker
- Coronet Major
- Coronet Majorette
- Coronet Major General
- Coronet Minor
- Coronet Minor paperwork
- Coronet Minorette
- Ernest's Coronet Minor
- Readers Machines
- More Readers Machines
- Even More Readers Machines
- Yet More Readers Machines
- MILFs
- Guestbook and comments
- Heimag A5 Tischbohrmachine