The Coronet Imp bandsaw.
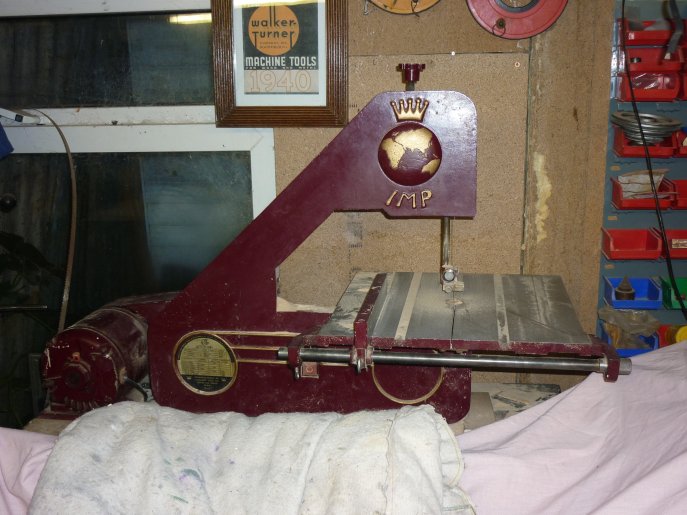
My Coronet Imp bandsaw. Acquired in good overall condition yet the guides and table mechanism needed a thorough overhaul. Over thirty five years old and still superior to the modern imports in my biased and foolish opinion. I have to say that last bit as I found myself being quoted on *bay by a seller and would not want to mislead anyone who did not have an interest in vintage machinery. These are not generally just "stop and go" machines that have flooded the market from abroad. You do need to have firstly an interest in old machinery and secondly, some degree of dexterity to run the machines satisfactorily.
If you're having trouble fitting blades to your Imp then have a look at my page on Coronet Imp bandsaw blade setting advice The blade length of the Coronet Imp is 67 1/2" (sixty seven and one half inches). If you want to see the manufacturers specifications direct from a catalogue then please scroll straight down to the bottom of the page.
Do not confuse the Coronet Imp with the Hillman Imp which is a small rear engined motor car made by the Rootes Group between 1963 and 1976. My auntie had one and I can still remember being in in the back seat of it with my younger brother. We were sliding down an icy road in Lancashire with my auntie at the wheel. We thought it was hilarious but apparently we slid past a road worker with his hands together in the prayer position, eyes towards the heavens. I kid you not.
The one below is in Coronet red but is clearly not a bandsaw. Not with that L plate on the front.
This bandsaw was bought from the pages of a local newspaper, the Blackmore Vale Magazine. It was being sold by an antiques restorer who was clearing his workshop. It is mounted on top of a double cabinet with four wheels (like the Hillman Imp). It went straight into use in the workshop but the woodworking machines took precedence for inclusion on the website despite my best intentions.
But finally after about five years of missed deadlines, temporary lack of interest, medical mayhem, zero patience, technological incompetence, lost and broken cameras, I could go on...here are some pictures of my Coronet Imp.
What a logo, suggesting a global presence which is confirmed by Coronet owners contacting me from as far away as Australia, New Zealand, Northern Ireland and South Africa. And Wimborne, Dorset.
Below, the pulley speed information.
My Imp has stood idle since I snapped a blade some time ago so I am taking the oppportunity to clean it up and fit a new blade.
Knurled nuts. Just one of these sounds painful but the Imp has three to the rear of the machine that must be undone to allow the cover to be removed from the front.
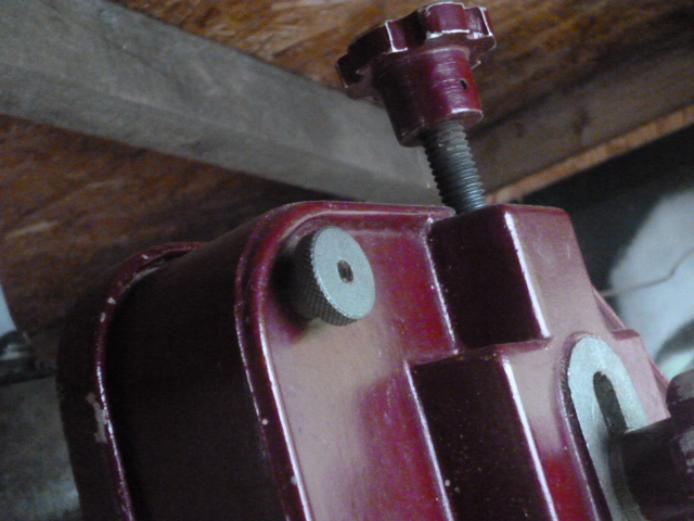
No1 knurled nut, top left.
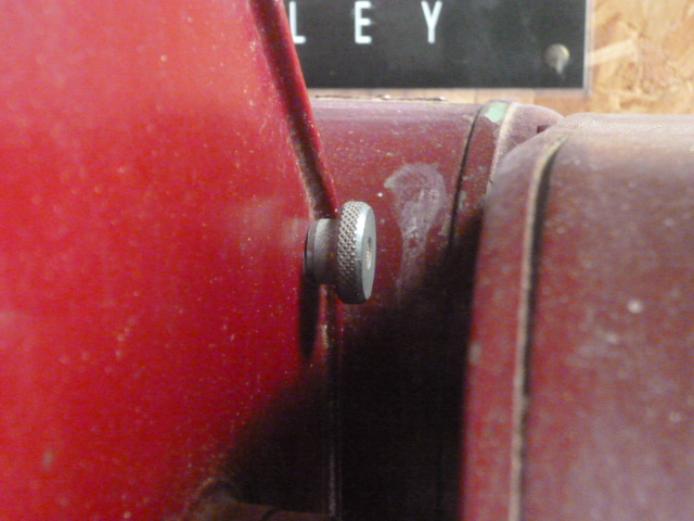
No2 knurled nut, bottom right. In between the main body and the belt guard.
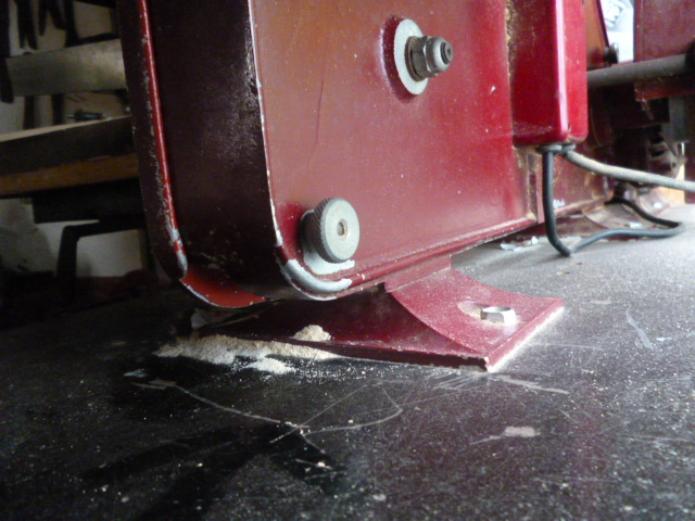
No3 knurled nut, bottom left. And that's enough about knurled nuts. It's not big, it's not clever and it's definitely not funny. Now remove the cover and get on with it.
This is how NOT to leave your bandsaw when idle.
And collecting fine sawdust all over the electrical box is a real no-no I'm told. . Tut tut.
The Imp from the rear.
The top wheel raises and lowers the wheel therefore tightening or loosening the blade. The lower wheel locks it in position and the knurled bolt below tilts the wheel.
With the belt guard raised you can see the three step pulleys and belt.
Seen from above, the three stepped pulleys.
The motor spec plate, speaks for itself really. Even if it is a little blurred.
An ingenious attachment, for cutting large radiused discs. I think it's what my surgeon used on mine. A pdf of a CAD drawing of this is now available via the link below. If you choose to download it then please consider making a donation however small to the PICU at Southampton Hospital.

|
Coronet Imp circle cutting attachment.pdf Size : 628.083 Kb Type : pdf |
Have a close up, the bracket is held on in two ways. Very thoughtful.
The guide assembly and thrust bearing which is showing some wear. It really needs replacing.
One of the guides has been removed to show the bracket. As you can see in the picture above, the left hand machine screw is too long and a spacer has been added. Something else that needs replacing. Or is it? Scroll down to solve the mystery of the extra-long screw and spacer, something that me and my mate Derek have been puzzling over.
On the side of the assembly you can see the grub screw that holds the bracket in place when set.
On the other side there is the grub screw that allows the thrust bearing to be adjusted.
This shows the second set of guides which are located directly underneath the saw table. Bit dusty too and blurred too..
Also under the table but on the other side is the angle setting guide as the Imp has a tilting table to 45 degrees.
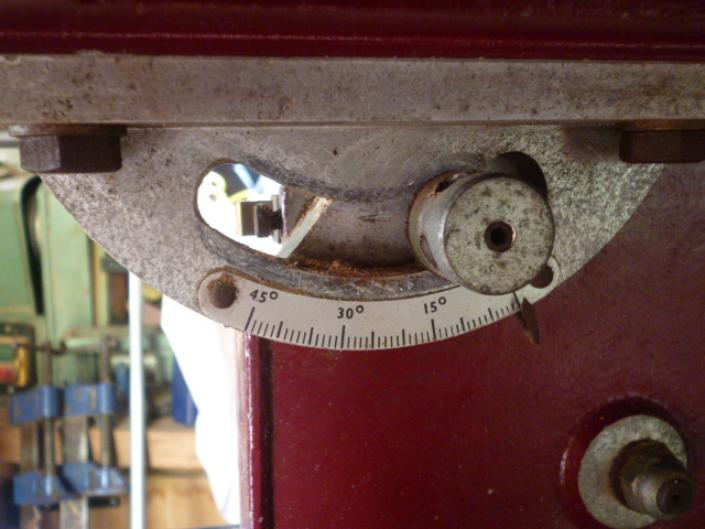
The tyre on this wheel is also showing some wear but not surprising on a forty year old machine.
Having cleaned the machine it's now time to fit a new blade and give Axminster Tools a plug at the same time. Well they do make us a cup of tea when we visit.
To fit the blade, first of all the bar must be unscrewed and slid back to behind the blade line.
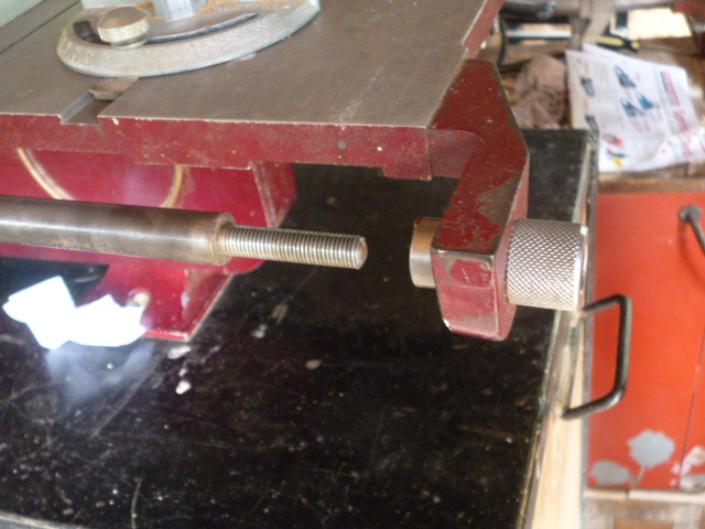
Then there is a small clasp underneath the table where the saw line starts that must be opened up to allow the blade to pass through the table.
The blade must be fitted between the guides with the back just in front of the thrust bearing. When the blade is fitted and tightened then the thrust bearing can be adjusted finely.
Similarly with the underneath guides.
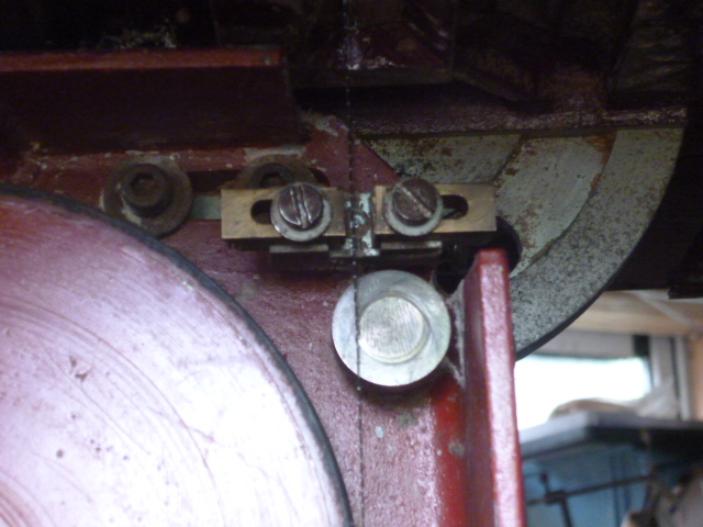
Now adjust using the blade setting advice on the site. Here's the link again: bandsaw blade setting advice
Here it is all set up and ready for the next job. After stripping and cleaning my machine I feel that I really know it and therefore how to get the best from it.
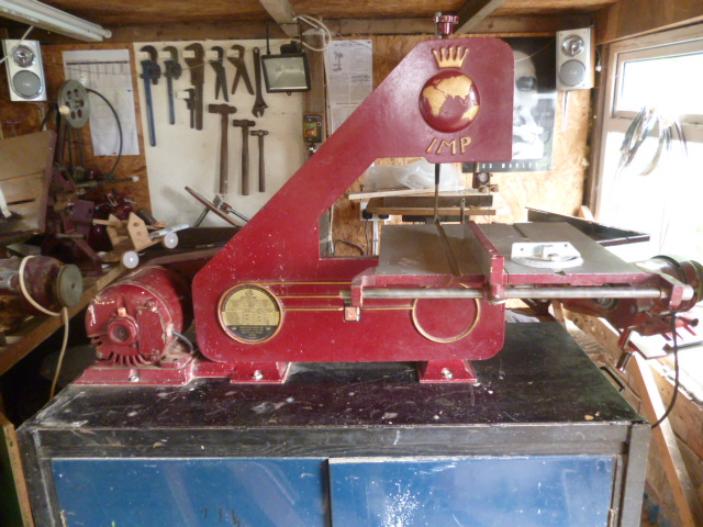
And now below we have some advertising for the Coronet Imp lifted from old catalogues.
I can't believe that an Imp would be allowed in any of the above premises these days due to the H+S, PC brigade nonsense. And a damn shame too.
Recently I was contacted by Linus from Sweden who had bought a Coronet International for the equivalent of £26. Amongst his accompanying paperwork was the Imp leaflet I have been looking out for, for ages. He kindly sent in photos of it and I hope to have a scan of it to upload in the future. The rubber stamped text is the dealers details as you'd expect it to be.


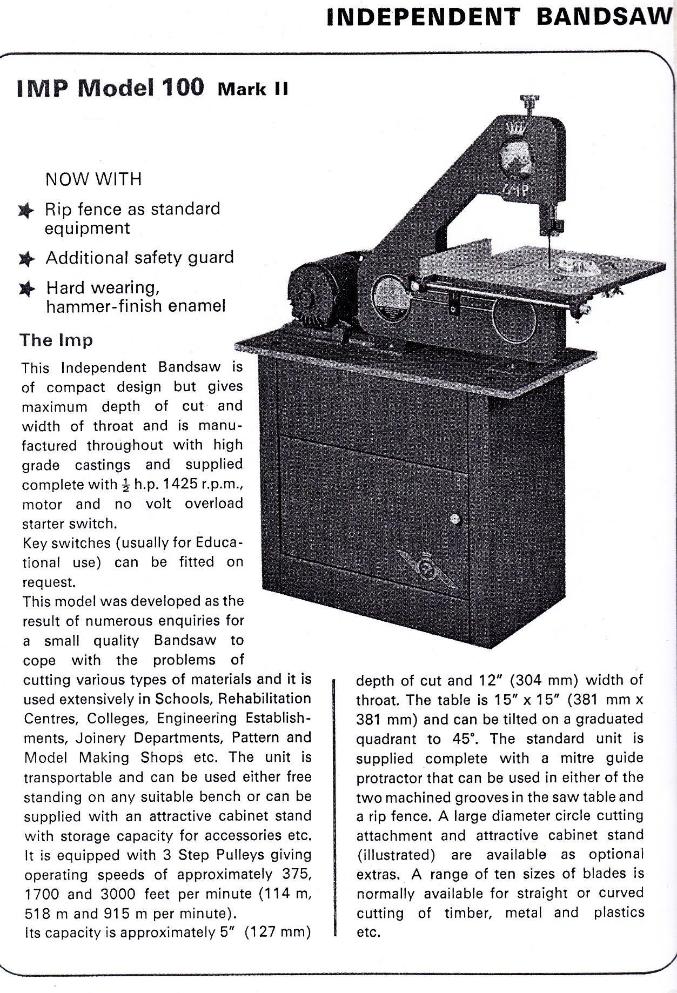
Yes that is an attractive cabinet.
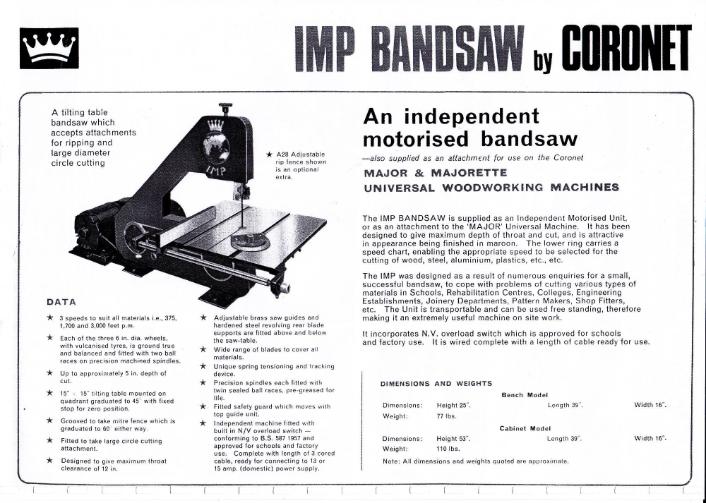
Here we have another Imp. This time it is an attachment for the Major and the pictures were sent in by Brian.
He has done a nice job of cleaning it up.
The paintwork's a bit shabby on the front but that can be sorted out.
Just to prove the Imp is indeed a three wheeler.
(Below) Now that just looks good and is hopefully on the way to the Boleyn in the future. Thanks for the pics Brian, I know it's taken me a while to crack the uploading code.
Well this is interesting, at least if you're a fan of the Coronet Imp and were wondering why there are bolts of a different size and a spacer on the guide assembly on some models. And when he explained it, it became so blindingly obvious I had to wonder why I hadn't thought of it before. I had an email from a chap called Adam who wrote in to solve the mystery and kindly sent photos to demonstrate. Quite simply they are there to hold a blade guard in position. He has been restoring a Coronet Imp that came from an educational establishment probably hence the guard. See pics below...
It's always handy when a measure is placed against an object in a photo.
Here the guard is laid on its side revealing its full length to be approx six inches (6") sorry I refuse to do metric.
Above the guard and guide assembly is seen with the screw and spacer.
And above the guard has been fitted and you can see how it goes in to the front casing.
The front casing is added and now the post 1976 H+S approved Imp is ready for work. The guard is adjustable vertically as it is attached to the assembly and had the knurled knob on the back to tighten or loosen. Many thanks Adam for solving that minor but niggling mystery.
Apologies if you recognize this Imp below because I have forgotten who kindly sent them in. Care to jog my memory? They are dated August 2014 so not really that long enough ago to have been mislaid. But it was a testing month for me. Many thanks for the pics it is a decent display.
- FOR SALE
- About the Boleyn
- Home
- Zakwood Workshop Embu KENYA
- Julian Harrisons Workshop
- Inside the Boleyn (2005-2012)
- Inside the Boleyn 2013
- Inside the Boleyn 2014
- Inside the Boleyn 2015
- Inside the Boleyn 2016
- Inside the Boleyn 2017
- Inside the Boleyn 2018
- Inside the Boleyn 2019
- Inside the Boleyn 2020
- Inside the Boleyn 2021
- Inside the Boleyn 2022
- Inside the Boleyn 2023
- Inside the Boleyn 2024
- Inside the Boleyn 2025
- Technical Stuff
- Speed reduction gearbox fitting and operating instructions
- An Interview with Derek Pyatt
- Apollo no1 stove
- Coronet Imp bandsaw-blade-setting-advice
- Coronet Imp official hints on using
- Brook Gryphon 1hp motor connection diagram
- Charles Parker
- Coronet advertising etc
- Coronet Woodworking Machines catalogue
- Coronet Capitol planer
- Coronet Sovereign planer
- Coronet Classic 10 bandsaw
- Coronet Imp bandsaw
- Coronet Consort
- Coronet Elf
- Coronet Hobby lathe
- Coronet Home Cabinetmaker
- Coronet International Woodworker
- Coronet Major
- Coronet Majorette
- Coronet Major General
- Coronet Minor
- Coronet Minor paperwork
- Coronet Minorette
- Ernest's Coronet Minor
- Readers Machines
- More Readers Machines
- Even More Readers Machines
- Yet More Readers Machines
- MILFs
- Guestbook and comments
- Heimag A5 Tischbohrmachine